Zelda Kingdom of Tears Orochium Shrine Guide
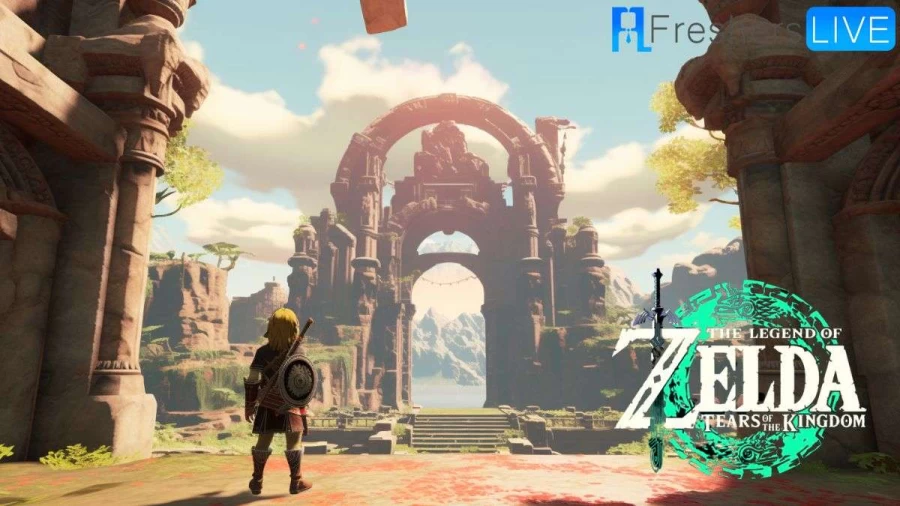
The Orochium Shrine in Zelda: Kingdom of Tears is quite extensive, with numerous enemies and laser traps. Similar to the Tukarok Temple, the goal is to transport a metal ball from the back of the temple to the front. First use the Ultrahand to open the door in front of you. Be careful with lasers and avoid them completely. Note the ball pit on the right and the hallway on the left.
- Jusant Release Date, Gameplay, Story, and More
- Like A Dragon Infinite Wealth Walkthrough, Guide, Wiki, Gameplay, and Trailer
- Palworld Pals Not Working When Away From Base, How to Fix Palworld Pals Not Working When Away From Base?
- Horror School Fortnite Walkthrough, Guide, Gameplay and More
- Diablo 3 Season 28 Tier List, PTR, Builds, Start Date, And Start Time
In this area you will encounter Soldier Construct II. Aim your bow at its head and quickly eliminate it with melee attacks while it’s stunned. When defeated, it drops a valuable Soldier Construct II Horn, which increases the weapon’s attack power by 8, so be sure to retrieve it. Next, equip the Ascent ability and turn your attention to the tower in front of you. Yes, you will rise.
You are watching: Zelda Tears of the Kingdom Orochium Shrine Walkthrough, How to Complete Orochium Shrine in Zelda Tears of the Kingdom?
Climb the ladder to the top, then crouch and crawl into the next room. An enemy is waiting below you (another Soldier Construct II), so be ready to destroy it. You can use a bow to get it down from this higher position. In our case, two shots were made using the 25x reinforced Lizal bow. Then, glide down and around the stairs to defeat another Soldier Construct II.
It guards a chest containing five arrows, so grab them while you’re nearby. Go back up the stairs to find another door that requires the Ultrahand. Turn it on and lo and behold, more lasers! Climb under them to encounter a pair of enemies on either side of the green door in front of you, take them out with your bow, then move on. The green door hides the ball that we need to return to the starting point and requires a key.
To get the key, turn around and dash into the laser trap, this action will activate the trapdoor, causing you to fall into a corridor with a moving laser. Hurry past them and use Ascent at the end of the corridor. There, you’ll find a treasure chest hiding a Small Key.
Go through the laser corridor again and through the trap door that fell down earlier, now it’s time to open the green door. Grab the ball and ascend the stairs behind the locked room to continue to the floating platform.
See more : How to Make Rubber in Infinite Craft?
Drop the ball into the pit and watch the gorgeous wings unfold. Observe the two fans attached to it. Attach the ball to the wing and place it on the track, then hit it with your weapon to activate the fan, allowing you to ride back to the starting point of the shrine. Remove the ball, throw it into the pit, and mission accomplished. Continue to interact with the Sigil to obtain the Blessed Light and successfully complete the Temple of Orochium!
How to Complete the Orochium Shrine in The Legend of Zelda: Tears of the Kingdom
In the Orochium Shrine in The Legend of Zelda: Tears of the Kingdom, your journey includes discovering and unlocking two treasure chests. One of the chests contains the key to the coveted Blessed Light within the temple. Follow these steps to successfully pass through this shrine: Upon entering, you will immediately encounter a door ahead that requires the use of the Overhand to open.
However, the path is blocked by a laser barrier, reminiscent of Sahiro Shrine. Instead, you must choose the path on the left. Finally, use boosting abilities to climb to the next level. Here you’ll find a ladder that leads to another level. In this section, you have to crouch down to get through a small hole. Once you reach the other side, jump and slide to the left, then continue moving to the left. At this point you can find the treasure chest in the temple. There are five arrows in one of the boxes.
Go back the way you came and you’ll come across another door. Use Ultrahand again to open it and continue. Be careful when crossing the road to avoid getting hit by the laser. However, if you happen to get hit, have no fear. You’ll descend into an underground passage that ascends to easily reach the next level of the temple in The Legend of Zelda: Tears of the Realm.
In this section you must overcome the challenge of defeating two constructor robots. Then, return to the prison-like structure and retrieve the ball. Go back the way you came, climb the stairs, and turn right. You’ll come across an elevator-like platform. Step on it to proceed to the next level.
Here, place the ball on the switch, which will activate the Zonai plane. Place the ball on the plane and use it as a vehicle to reach the next level. Get the ball from the plane and place it on the switch to open the door to the last room of the temple. In this room, collect the long-awaited Light of Blessing as your reward.
trend
The Legend of Zelda Orochium Shrine Location
Discover the mysterious Shrine of Orochium, nestled in the majestic Hebra Mountains to the northwest of the Forgotten Temple, which you will encounter on your fascinating journey in pursuit of the Geoglyphs quest. The exact location of this shelter is revealed, its coordinates are as follows: latitude -1638, longitude 2643, altitude 0239. Get ready for the cooler weather that awaits on these towering peaks by donning some ancient warm leggings, or indulge in a fortified defense that’s a magic elixir that’ll help you ward off frigid temperatures and keep you comfortably warm.
Orochium Shrine – The Legend of Zelda
The Orochium Shrine represents a sacred location in the Enchanted Kingdom of The Legend of Zelda: Breath of the Wild. Nestled in the majestic Hebra Mountains, this shrine is a testament to the complex trials and tribulations of the game. To gain access to this venerable sanctuary, players embark on a journey to the southeastern region of Pikida Stonegrove Sky Observation Tower, located just north of the stunning Icefall foothills.
Once inside the temple’s hallowed halls, adventurers are immediately plunged into a realm filled with formidable obstacles and daunting trials. These include harnessing Magnesis’s awe-inspiring powers to manipulate chunks of metal, cleverly dodging laser beams through the clever use of Cryonis, and the daunting task of spinning giant gears with Magnesis.
Throughout their exploration, brave players will encounter a series of opponents lurking within the temple’s confines, including powerful axe-wielding guardians. The pinnacle of the shrine experience is the central platform, where a brilliant blue sphere awaits, beckoning with mysterious charm. Clever use of the stasis ability allows players to freeze the sphere in its ethereal glory.
Later, a bold jump onto the central platform will reveal the key, which is being guarded by a vigilant guardian. Players must then use their ascending abilities to travel through corridors filled with dangerous laser beams, and again use the key to cross grates hanging above boxes, revealing the pinnacle of their efforts. At the end, a fierce encounter with the Guardian awaits, a daunting challenge that must be overcome before receiving the well-deserved reward that awaits the brave adventurer.
Disclaimer: The above information is for general information purposes only. All information on this website is provided in good faith, but we make no representations or warranties, express or implied, as to the accuracy, adequacy, validity, reliability, availability or completeness of any information on this website.
Source: https://anhngunewlight.edu.vn
Category: Gaming